
How To Paint Furniture
I’m totally obsessed with furniture painting, and guess what? Like you, when I started, I didn’t really know what I was doing. As a result, I’ve made all the mistakes, so you don’t have to!
Learning things like why prep is so important, what types of paint work best on wood, how to avoid brush marks, when to strip or sand, how to know if something is wood, and so on!
I’ve figured out many of the answers to the most common questions about painting furniture through trial and error. Which, frustrating at the time, has really helped me perfect my furniture painting process!
So, let’s get right to it- here’s how to paint furniture.
Just a quick heads-up: Everything in this post reflects my genuine opinions and recommendations, but it’s not a substitute for professional advice. To keep this content free, I use ads and include affiliate links, which means I earn a small commission at no extra cost to you.
Getting Started with Furniture Painting
Painting wood is the perfect place to start when dipping your toes into refinishing furniture. That’s because paint is very forgiving. So, if you sand too hard in one spot or not enough in another, it doesn’t matter too much.
Don’t be intimidated! There are only five steps to painting wood furniture, one of which is cleaning – and I know you already know how to do that! See? You’re a pro already.
Before starting, gather all your furniture makeover tools and supplies- here is my list of trusted sources!
Painting Wood Furniture Step-by-Step
The furniture I paint is usually acquired from a thrift store, Marketplace, or the side of the road. I don’t pay much for these pieces, which makes the transformation all the more exciting.
To begin, you’ll need a piece of furniture. Preferably wood or veneer. Less ideal is laminate or particleboard. Not sure how to tell the difference? Learn my 8 tricks to spot different types of wood furniture in this post!
I have compiled a resource about finding quality furniture and suggest you check it out because higher quality wood is soooo much easier to work with than, let’s say, Ikea paperboard.
Step 1: Cleaning Wood for Furniture Painting

I kind of love this step because you never know how much gunk will come off the surface. Sometimes, it’s satisfying, and sometimes it’s just gross.
I use a degreaser like Krud Kutter followed by a drop of Dawn dish soap in warm water. The more you can get off by cleaning, the easier it is to sand, and the better your paint will stick.
And for this reason, don’t skip this step even if your furniture piece looks clean. Plus, cleaning is easy.
Use a clean, old rag and wipe every inch of the piece down. Inside drawers, inside doors, top, sides, bottom… you get the picture.
Start by wiping everything down with the degreaser, followed by a soapy water rinse. Finally, wipe everything down with a clean, damp rag.
Step 2: Preparing Wood

When painting furniture, the prep is much less than if you were staining it. Again, that’s why furniture painting is the best furniture makeover to try as a beginner.
You will start by removing any hardware and hinges.
I put these in a Ziplock baggie and label it – this is a lesson I learned after misplacing an important screw or knob one too many times.
To prepare the surface for paint, you have to sand.
Have I painted furniture without sanding? Yes! And nothing bad happened, but it’s not the best idea if you’re looking for quality, lasting results. And I would never sell a piece if I did not follow my best furniture painting process.
Start by sanding the whole thing using coarse grit sandpaper, either 80 or 120. Depending on your piece size, you can do this by hand or with a power sander. Apply a medium amount of pressure so that you are scuffing the surface and removing and smoothing any loose paint chips.
You are not trying to remove the original layer. You do not need to sand to bare wood. Instead, imagine you are roughing the surface just enough so that your paint has something to grip onto.
Once done, you’ll wipe away all of the sanding dust. When working outside, my favorite hack is using the leaf blower.
>> Hey, girl! Save time, avoid costly mistakes, and achieve the transformation you’ve been dreaming of. Grab your copy of the Ultimate Furniture Makeover Guide!
Step 3: Priming Wood Furniture
Next step is to apply a primer, which I always use Zinsser 123. You want a good primer for two reasons 1. adhesion and 2. coverage.
The adhesion thing is important because this means how well it sticks to the surface. If you’re primer doesn’t stick, then your paint won’t either. Using a low-grade primer would be like building your house on sand.
Next, solid coverage means less coats which means less time consuming, and less money spent on supplies.
Follow this process to apply primer:
- use a brush to get into corners, and a foam roller to do larger areas.
- apply the primer in thin coats. It’s normal for the first coat to look streaky.
- after letting the first coat dry to touch, sand the entire surface with 220 grit sandpaper.
- wipe away all the sanding dust and apply a second coat.
- let it dry, and sand again.
I always apply two thin coats of primer. The reason you don’t want to do one thick coat is because if you apply paint too thick that’s when you get drips, and an uneven finish. It also takes forever to dry.
Step 4: Painting furniture

This is where I always get really excited because finally the real transformation comes to life. And the best part is painting goes faster than primer. With each coat you apply, each one goes on faster. So, if the first coat took an hour, the next would be about 45 minutes, followed by about 30 minutes and then maybe 20.
This is just something I’ve noticed, and when I’m getting annoyed with priming, I always remind myself that it will keep getting easier!
So, how to paint furniture? It’s as simple as using the same process as the primer.
Always apply two coats. Unless you are using a highly specialized paint (I trust only a few to take only one coat).
I’ll go into more detail about the best paint for furniture in the FAQ section.
And here’s another painting furniture hack I’ve learned: place your furniture piece on old paint cans to elevate it off the ground! See the image above for a visual. When I discovered this hack, my mind was blown. It’s so simple, costs nothing, yet makes painting a bottom much easier.

Stop piecing together information from different sources and get everything you need in one place.
Save time, avoid costly mistakes, and achieve the transformation you’ve been dreaming of.
Grab your copy of the Ultimate Furniture Makeover Guide.
Step 5: Adding a Topcoat
I’m not big on adding a topcoat to my painted furniture. I feel pretty confident in the durability of my work, and here’s why: a thorough cleaning, proper sanding, high-quality primer, and paint are definitely enough to create a long-lasting finish.
One topcoat that I will use on raw wood is a liming wax. What I love about this product is that it highlights wood’s natural grain while providing a light layer of protection. You do have to use caution when cleaning a lime-waxed surface (don’t use something too harsh) because it will remove the wax.
If you need more protection or want more peace of mind, apply a poly topcoat. Here are a few things to know about poly:
- poly is finicky to apply
- the biggest complaint is how streaky it looks
- oil based poly will draw yellow tones out of raw wood
- a trick to see how natural wood will look with poly is to wipe it down with a damp cloth – this gives an idea of what the finished look will be
Update!! Sealing furniture was the bane of my existence… until I found this wood sealer! No streaks, no frustration. I absolutely love the matte finish—it gives a flawless, protected look without all the fuss!
Hey girl, loving this project?
📌 Pin it now so it’s easy to find when you’re ready to tackle it. Just hover over the image and click the Pinterest button 👇


Furniture Painting Ideas Before and After Inspiration
Here are some of my recent painted furniture pieces. There is a funny story that goes with every one of these, I hope you enjoy and are inspired by each!
Two Tone Painted Dresser Sage Green and Natural Wood
This dresser was a curb side freebie! My mom actually snagged it for me, right after she complained about how many projects I had.
Her explanation was that this was just too cute to pass up. The woman was giving it away because it was her sons, but his new wife thought it was ugly. Ha! Jokes on her! This dresser cleaned right up, and with a little paint, is a piece that I get compliments on the regular.
I didn’t take any pics of what this looked like before, but you can imagine 90’s tacky veneer on the drawers, that was also falling apart. That’s the before!


Black and Wood Apothecary Cabinet
Although this piece is tricky to photograph (because it’s long) it’s one of my absolute favorites! This piece was once an old dresser and I turned it into a two-toned painted coffee bar, dining hutch thingy.


Antique Display Cabinet Painted Sage Green
This cabinet was a barn sale find. I paid $40 for it, used it in my home for 2 years, then moved and no longer had a space for it. I tried selling it as you see in the first pic but had no takers. So, I decided why not paint it. That did the trick because this sold in one day for $250 🙂
I was actually quite sad to see this one go! The shelves cleaned up beautifully. And the wallpaper backing was the icing on the cake!


Two Tone Kids Dresser Painted Blue
Furniture painting to the rescue on another furniture freebie! My son absolutely adores his dresser. It’s so perfect for him because he’s 5 and can easily reach and see everything that he sets on the top. I love the natural wood accents on the draws, the blue paint is the perfect shade, and looks amazing with the black hardware.
Read more in this tutorial where you’ll learn how to get this painted blue and two tone wood drawer look.


Two Toned Antique Hutch Painted Green
I acquired this very old (and very stinky) antique hutch as part of a package deal. I wanted the chairs in this set, but for good reason, the woman did not want to split the items.
So, for $500 I walked away with a solid maple 10′ dining table, 6 chairs, and this hutch (which also had a top that is not shown here).
The only down fall to this transaction was how terrible everything smelled. The person was a smoker sooo everything smelled like stale cigarettes. It took a few weeks out in the garage, a good cleaning, and fresh coat of paint, but this hutch cleaned up beautifully!
Unfortunately, I did not have room for this piece, so I sold it for $400. Not a bad deal if you think about it – I essentially paid $100 for the chairs that started this whole ordeal!


Large Wood TV Cabinet Painted White
I snagged this very large, and very heavy solid wood cabinet for $75 at the Resource store. It was the perfect piece to hide my TV when not in use.
Unfortunately, moving meant I no longer had a place for this, so I was forced to part with it. This sold for $220. My favorite part about this painted furniture piece is the surprise inside. Take a look!


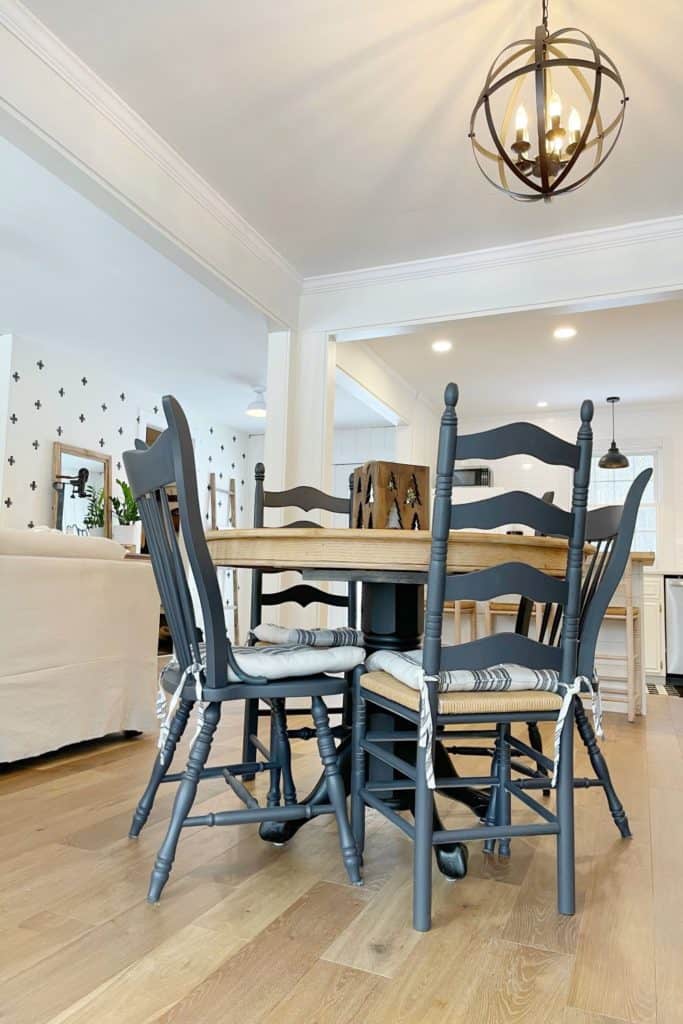
Painted Clawfoot Dining Table
Gosh that oak is terrible! But nothing a little stripping, sanding, and painting can’t fix! Here is my black painted clawfoot dining table with painted black chairs.

Furniture Painting FAQ
>> Save time, avoid costly mistakes, and achieve the transformation you’ve been dreaming of. Grab your copy of the Ultimate Furniture Makeover Guide!
Should I be worried about lead paint?
Possibly. So, when sanding, treat it as if it were lead and wear a proper mask that has a P100 filter in combination with a standard filter so that you’re protected from particulate (aka super tiny particles).
Do I have to sand before furniture painting?
Yes! Every time, yes!
Should I remove hardware (handles, knobs) before painting?
It’s much easier to work when all of the handles, knobs, hinges, and so on are removed. This also includes taking the doors off as well as removing the drawers from the base.
What type of paint should I use?
My top three favs are Behr Ultra Scuff Defense (yes, this is wall paint), Fusion Mineral Paint, and Amy Howard 1 Hour Miracle Paint
What is the best way to avoid brush strokes?
Use a foam roller when at all possible. When using a brush, make sure you’re applying in thin layers, and trust that the brush marks will fade as the paint dries.
Also, sanding between coats helps reduce brush marks.
Should I use a brush, roller, or paint sprayer to paint wood?
Any of these options work, and often times I’ll use all of them on one project.
I use the brush for grooves, trimming, and detail work. Then a foam roller for flat surfaces like the top of a dresser, and door and drawer fronts. And a paint sprayer for larger projects, or hard to paint surfaces like spindles.
How long should I wait between coats?
Follow the directions on the paint container. This time varies from 1-3 hours. When you touch the paint, it should not feel tacky or leave any marks on your hand.
And when in doubt wait until you’re sure it’s dry because there is nothing more frustrating than ruining your finish because of impatience.
What is the best way to fix paint drips?
The best approach is to try and avoid them – I frequently check my work and look for drips, smoothing any out before the paint dries. Also, applying your paint in thin coats helps prevent these.
To remove dried-on paint drips use a metal scraper or razor blade. Follow this by gently sanding the area and re-applying paint to cover the spot.
Next Steps
- Save time, avoid costly mistakes, and achieve the transformation you’ve been dreaming of – download your guide!
- How to tell Real Wood Vs Fake Wood Furniture
- 10 Ways to Remove Paint From Wood
- Staining wood without blotches
- 17 Ways to Drastically Improve Your Wood Sanding Skills!
There you have it! The furniture painting process I use when painting wood. As you can see, it’s really pretty simple, and yet the transformations are incredible. The options are also endless, so the fun is really just beginning!

Stop piecing together information from different sources and get everything you need in one place.
Save time, avoid costly mistakes, and achieve the transformation you’ve been dreaming of.
Grab your copy of the Ultimate Furniture Makeover Guide.


